Best 3D Printers for Cosplay & Props
Cosplay printing comes down to two things: size and speed. Helmets, pauldrons, and weapon props are large, every split seam is visible after paint, and a full armor build often runs 200+ print hours. The best 3D printer for cosplay in 2026 has a 300mm+ build volume in at least one dimension, prints at 300mm/s or faster, and runs PLA+ reliably overnight. Below: top picks across three budget tiers, a quick comparison table, what to look for, expanded FAQ, and the mistakes that ruin cosplay prints.
In a hurry? Our top picks:
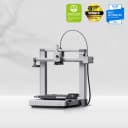
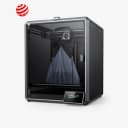
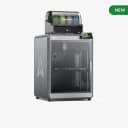
What to look for
Build volume
300mm+ in at least one dimension. A 350x350x350mm build volume handles most helmet designs in one piece.
Print speed
At 200+ hours per project, the difference between 200mm/s and 500mm/s is real. Fast printers cut project timelines in half.
PLA+ compatibility
PLA+ is the cosplay material of choice — strong enough for props, easy to sand and paint, cheap enough for large projects.
Reliability
A 30-hour print that fails at hour 28 is devastating. Reliability and resume-after-power-loss features save projects.
Quick comparison
| Printer | Build Volume | Max Speed | Tech | Price |
|---|---|---|---|---|
| Bambu Lab A1 | 256×256×256mm | 500 mm/s | FDM | $299 |
| Creality K1 Max | 300×300×300mm | 600 mm/s | FDM | $649 |
| Creality K2 Plus | 350×350×350mm | 600 mm/s | FDM | $899 |
Our picks
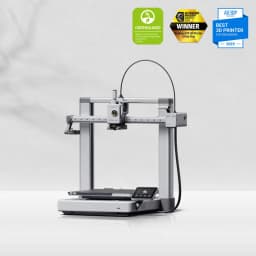
Bambu Lab A1
- • $299 — Bambu Lab A1
- • Fast: up to 500 mm/s
- • Auto-leveling for hassle-free setup
- • Multi-color via AMS Lite
Creality K1 Max
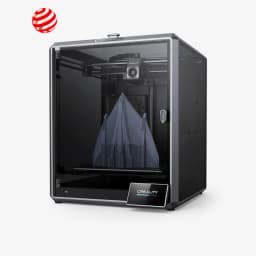
- • $649 — Creality K1 Max
- • Fast: up to 600 mm/s
- • Enclosed for ABS/ASA and quieter printing
- • Auto-leveling for hassle-free setup
Creality K2 Plus
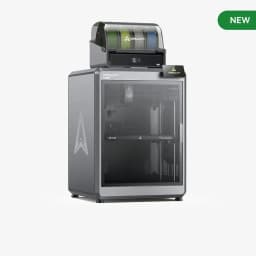
- • $899 — Creality K2 Plus
- • Fast: up to 600 mm/s
- • Enclosed for ABS/ASA and quieter printing
- • Auto-leveling for hassle-free setup
Common mistakes to avoid
- ×Not scaling models to your actual head/body measurements before printing
- ×Using standard PLA instead of PLA+ — PLA is too brittle for wearable props
- ×Skipping the primer step before painting — paint won't adhere well to raw prints
- ×Choosing a slow printer — cosplay projects are enormous, and print speed matters more here than anywhere
- ×Underestimating post-processing time — sanding and painting often take as long as printing itself
- ×Trying to print a 350mm helmet on a 220mm bed — measure your model against your bed size before assuming it fits
Build Volume Requirements for Common Cosplay Pieces
The single biggest decision for cosplay printers is build volume. Every split print is a glue seam that must be sanded, body-filled, and primed before paint - so printing in one piece, when you can, saves real hours of post-processing. The table below shows typical scaled-to-fit dimensions for adult cosplay pieces and the minimum printer build volume needed to print them in a single piece. "Minimum" assumes the piece can be tilted on the build plate; with stricter orientation requirements, round up.
Typical adult cosplay piece dimensions and the minimum printer build volume to print in one piece
| Piece | Typical scaled size | Min printer build volume |
|---|---|---|
| Standard helmet (e.g., Mandalorian, stormtrooper) | ~250 × 250 × 280 mm | 256 × 256 × 280 mm |
| Oversized helmet (Halo, Iron Man, Predator) | ~300 × 300 × 320 mm | 300 × 300 × 320 mm |
| Pauldron / shoulder armor | ~200 × 250 × 200 mm | 256 × 256 × 256 mm |
| Cuirass / chestplate (split top/bottom) | ~300 × 350 × 200 mm per half | 350 × 350 × 200 mm |
| Greaves (shin armor) | ~150 × 200 × 350 mm | 200 × 200 × 350 mm |
| Bracers / forearm armor | ~150 × 200 × 200 mm | Most printers fit |
| Sword / staff prop (split into 2-3 segments) | ~80 × 80 × 350 mm per segment | Most printers fit |
| Full mask (e.g., Spider-Man, Batman cowl) | ~220 × 250 × 300 mm | 256 × 256 × 300 mm |
Why PLA+ for Cosplay? Material Choice in 60 Seconds
PLA+ is enhanced PLA - the same biodegradable polylactic acid base with proprietary impact modifiers that improve toughness without sacrificing the ease of printing that makes PLA the standard cosplay material. Standard PLA has a tensile strength around 50 MPa but tends to be brittle; PLA+ keeps similar tensile strength while improving impact resistance enough that finished props survive normal convention handling.
PETG is the second-best general option. It is more flexible than PLA+, which is useful for parts that need to bend slightly (forearm bracers, jointed armor sections, helmet liners). PETG is harder to sand smooth than PLA+ - the surface gums up rather than dusting off cleanly - so plan for filler primer on every PETG piece you intend to paint.
TPU is for flexible parts only - elastic straps, joint connectors, some helmet liners. It is not for structural cosplay parts. ABS is rarely worth it: harder to print than PLA+, requires an enclosure for warping control, and the only meaningful advantage (acetone vapor smoothing) is largely obsolete now that filler primer + sanding gives an equally smooth finish on PLA+.
Resin (SLA/MSLA) is appropriate only for small detail pieces - jewelry, sub-200 mm masks, fine ornamentation - where the surface finish is worth the trade-off in brittleness, post-processing complexity, and the PPE required for handling uncured resin. Resin parts crack under impact, so anything wearable that might get bumped should be FDM.
Print Speed vs Print Quality: The Cosplay-Specific Trade-Off
A typical full-size helmet is 20-40 hours of print time at moderate settings. A complete armor set (helmet, cuirass, two pauldrons, two greaves, two bracers) is 200-300 hours. Print speed is therefore one of the most consequential specs for cosplay - more than for any other use case.
Modern CoreXY printers advertised at 300-500 mm/s in marketing typically deliver real-world cruise speeds of 150-250 mm/s once you account for acceleration, perimeters, and overhangs. That's still 2-3x faster than the previous generation of 80-100 mm/s bedslingers. For cosplay specifically, a faster printer that finishes in 25 hours easily beats a slower one that finishes in 50 hours - the time saved compounds across a multi-piece project.
Layer height (resolution) matters less than non-cosplayers assume. Cosplay pieces are sanded, filled, sanded again, primed, and painted. A 0.28 mm layer height looks identical to a 0.16 mm layer height once it has been through a full post-processing pass. Print at the larger layer height to save hours per piece, and put the saved time into post-processing instead.