Best 3D Printers for Beginners
The best 3D printer for a beginner in 2026 has three things: auto-leveling (so you don't fight bed leveling for a weekend), plug-and-play setup that gets you printing in 15-30 minutes out of the box, and a large active community for when you hit a problem (you will). Budget $200-400 - cheaper than that usually means giving up one of those three. Below: top picks across three budget tiers, what to actually expect on day 1, a side-by-side comparison, expanded FAQ, and the mistakes that ruin a first 3D printing experience.
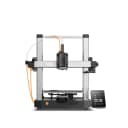
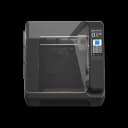
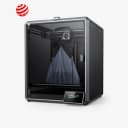
In a hurry? Our top picks:
What to look for
Auto-leveling
Manual bed leveling is the #1 frustration for new users. Auto bed leveling is non-negotiable for a beginner in 2026 — it automates the most difficult part of setup and prevents the most common cause of print failures.
Community support
Bambu Lab, Creality, and Prusa have the largest communities. When you hit a problem (and you will), help is a Reddit post or Discord message away.
Direct drive extruder
More reliable than Bowden, especially with flexible filaments. Less troubleshooting overall, and a better default for someone learning.
Plug and play
Minimal assembly required. Pre-calibrated from the factory. PLA should work on the first print. Look for 'ships assembled' or 'ready to print in 15 minutes' on the spec sheet.
Quick comparison
| Printer | Build Volume | Max Speed | Tech | Price |
|---|---|---|---|---|
| Anycubic Kobra 3 V2 | 255×255×260mm | 600 mm/s | FDM | $229 |
| QIDI Q1 Pro | 245×245×240mm | 600 mm/s | FDM | $469 |
| Creality K1 Max | 300×300×300mm | 600 mm/s | FDM | $649 |
Our picks
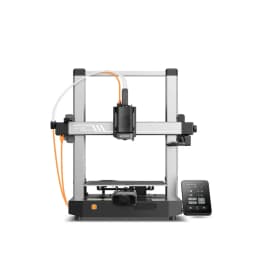
Anycubic Kobra 3 V2
- • $229 — Anycubic Kobra 3 V2
- • Fast: up to 600 mm/s
- • Auto-leveling for hassle-free setup
- • Multi-color via ACE Pro
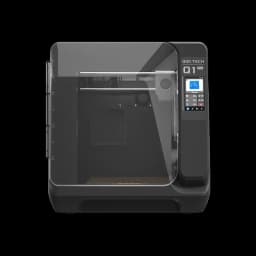
QIDI Q1 Pro
- • $469 — QIDI Q1 Pro
- • Fast: up to 600 mm/s
- • Enclosed for ABS/ASA and quieter printing
- • Auto-leveling for hassle-free setup
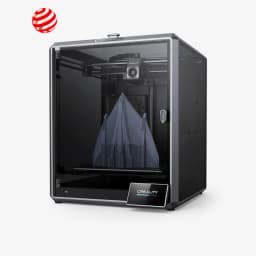
Creality K1 Max
- • $649 — Creality K1 Max
- • Fast: up to 600 mm/s
- • Enclosed for ABS/ASA and quieter printing
- • Auto-leveling for hassle-free setup
Common mistakes to avoid
- ×Buying a printer that requires manual bed leveling — auto-leveling is worth every penny for beginners
- ×Starting with ABS instead of PLA — ABS requires an enclosure and ventilation
- ×Skipping the first-layer calibration — it's the foundation of every good print
- ×Buying the cheapest filament — mid-range PLA (~$22/kg) is dramatically more reliable than bargain-bin rolls
- ×Not cleaning the build plate between prints — fingerprints and oils kill bed adhesion faster than any other factor
- ×Buying a kit-style printer (Voron, hand-assembled Ender) as your first machine — these are learning projects, not starter machines
- ×Trying to print at 250 mm/s+ on day 1 — fast print speeds need a tuned printer; start at 80-120 mm/s while you learn
What to Expect on Day 1: Unboxing to First Print
A modern auto-leveling beginner printer in 2026 is genuinely plug-and-play. Most ship pre-assembled, with the gantry, bed, and electronics already calibrated at the factory. Setup is closer to assembling Ikea furniture than to building a computer.
Step-by-step expectations from current-gen models (Bambu Lab A1 Mini, Creality Ender-3 V3 SE, Bambu Lab P1S, etc.): unbox and remove packaging foam (5 minutes). Bolt the gantry to the base if the model requires it - many do not (5-10 minutes). Connect power and run the on-screen auto-calibration: nozzle wipe, bed leveling, Z-offset (10-15 minutes, hands-off). Load filament (5 minutes). Send your first print from the included SD card or the phone app (5 minutes). Total: 30-45 minutes from box to bed.
Your first print will most likely be the included calibration cube or a small toy. Expect a 15-30 minute print at default settings. If the first layer looks even and smooth, you are done - this printer will work for you. If the first layer has gaps, blobs, or peels up, the bed is not level (re-run auto-calibration), the bed is dirty (wipe with isopropyl alcohol), or the Z-offset needs a small adjustment (most printers let you tune this from the touchscreen during the first layer).
Plan for the first week to be experimentation. Print 5-10 small test models from Thingiverse, Printables, or MakerWorld before attempting anything ambitious. This builds intuition for which settings need tuning on your specific unit.
$200, $300, $500: What Each Beginner Budget Actually Gets You
Beginner printer pricing in 2026 has compressed - the difference between a $200 printer and a $500 printer is meaningful but not enormous, and the floor of quality is higher than it has ever been. Here is what each tier typically buys:
What you get at each beginner budget tier in 2026
| Budget | What's included | Trade-offs |
|---|---|---|
| $150-200 | Functional FDM printer, often kit-style or partially assembled, basic auto-leveling, manual or semi-auto Z-offset, smaller build volume (180-220 mm) | Less reliable out-of-the-box, more setup time, smaller community for that specific model, may need upgrades within a few months |
| $200-300 | Auto-leveling, ships pre-assembled, 200-256 mm build volume, app control on many models, larger active community, plug-and-play out of the box | Limited print speed (typically under 250 mm/s sustained), single-material printing only, no enclosure |
| $300-500 | Faster print speeds (300+ mm/s on CoreXY models), larger build volumes (256-300 mm), better motion systems, optional enclosures, optional multi-color attachments on some models | Diminishing returns on first-print quality - the $300 model and the $500 model both produce great PLA prints with default settings |
| $500-800 | Enclosed designs, multi-material printing, premium auto-bed leveling sensors, lidar or AI flow calibration on some models, faster print speeds, larger build volumes | Most of the additional features only become useful after several months of experience - for a first printer, the $300-400 tier is usually a better fit |
FDM vs Resin for First-Time Buyers (and the One Case Where Resin Wins)
The default recommendation for first-time 3D printer buyers is FDM. The reasoning is workflow safety: FDM uses solid plastic filament heated and extruded, with PLA producing essentially no harmful fumes. Resin (MSLA/SLA) prints with a liquid photopolymer that is toxic until UV-cured, requires isopropyl alcohol washing of every print, needs a UV curing station for post-processing, and produces fumes that warrant a ventilated room. The PPE and workflow load is significantly higher.
Resin produces a smoother surface finish with sub-100-micrometer layer lines that FDM cannot match. For miniatures, jewelry, dental models, and other small high-detail parts, resin is the right tool. But for a first printer where you want to learn the fundamentals - calibration, slicing, materials, troubleshooting - FDM is dramatically less hostile.
The one scenario where resin is appropriate as a first printer: your specific goal is printing miniatures at 28-32 mm scale or smaller. In that case, buy a dedicated MSLA starter kit (Elegoo Mars or Anycubic Photon series) and treat resin handling like chemistry-class chemistry: gloves, eye protection, ventilation, IPA-rated nitrile gloves, and a clear, sealed disposal plan for waste resin. The print quality is worth it for miniatures specifically.
For everyone else - general-purpose printing, props, organizers, gifts, gadgets, anything functional - start with FDM. You can always add a resin printer later once you understand the workflow.
Related tools
Frequently asked questions
Sources
- First layer issues - troubleshooting guide — Prusa Knowledge Base
- How to fix the most common 3D printing errors — Prusa Research
- First-Layer Printing Optimization Guide — Bambu Lab Wiki
- 3D Printing 101: Perfect First Layer for Every Print — MatterHackers
- How To Succeed When 3D Printing With PLA Filament — MatterHackers
- 3D Printing First Layer Problems: How to Make It Perfect — All3DP